cPanel’s AutoSSL feature can use Let’s Encrypt as a free SSL certificate provider instead of (or alongside) the default Sectigo certificates. Let’s Encrypt issues free, auto-renewing 90-day SSL certificates for all domains on the server. This guide enables the Let’s Encrypt AutoSSL provider.
Step 1 — Install the Let’s Encrypt AutoSSL Provider
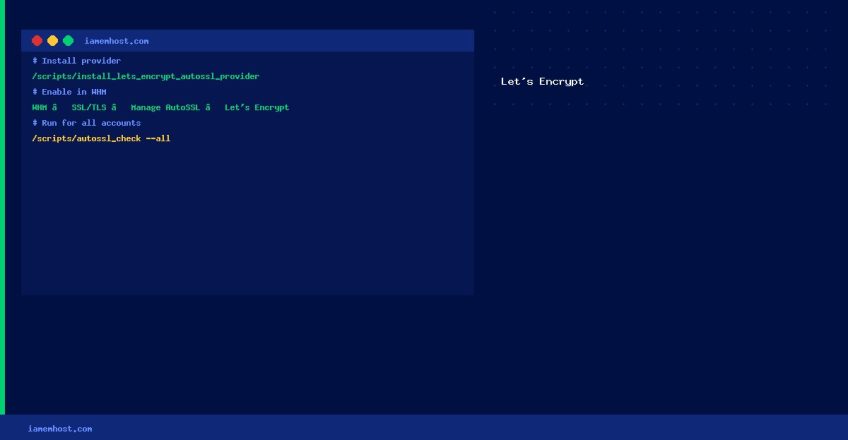
# Install via the cPanel installation script
/scripts/install_lets_encrypt_autossl_provider
Step 2 — Enable Let’s Encrypt in WHM
- Log in to WHM as root
- Navigate to SSL/TLS → Manage AutoSSL
- Under Providers, select Let’s Encrypt
- Accept the Let’s Encrypt Terms of Service
- Click Save
Step 3 — Run AutoSSL for All Accounts
# Issue Let's Encrypt certificates for all cPanel accounts
/scripts/autossl_check --all

# Or for a specific account
/scripts/autossl_check --user=cpaneluser
Verify Certificates are Issued
# Check SSL status for a domain
/scripts/ssl_status_domain --domain=yourdomain.com

# View AutoSSL log
tail -f /var/cpanel/logs/auto_ssl_check_log
Troubleshooting
- Rate limit errors: Let’s Encrypt limits to 50 certificates per registered domain per week. Spread installations across multiple days if needed.
- CAA record blocking: If your domain has CAA DNS records, add
letsencrypt.org:example.com CAA 0 issue "letsencrypt.org" - Domain not resolving: Let’s Encrypt requires the domain to resolve to the server’s IP. Check DNS propagation first.
- Port 80 blocked: Let’s Encrypt HTTP-01 validation requires port 80 to be accessible. Ensure your firewall allows it.

Disk Space Management on Linux: Find, Clean, and Monitor
IAMEM HOSTING HOSTCommon Web Hosting Problems and How to Fix Them
IAMEM HOSTING HOST