
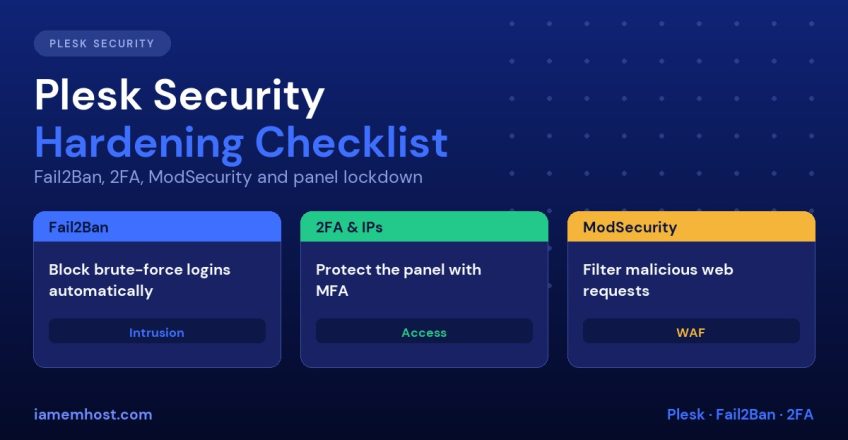

Plesk gives you a lot of security tooling out of the box, but most of it is switched off or left on its defaults after installation. The control panel on port 8443 is one of the most scanned services on the internet, and attackers constantly try password-guessing and exploit attempts against it. This Plesk security hardening checklist walks through the settings that matter most, in a sensible order, so you can lock down a server in an afternoon.
If you are starting from scratch, install first with How to Install and Secure Plesk Obsidian on AlmaLinux and Ubuntu, then return here.
1. Keep Plesk and the OS Updated
Most real-world compromises exploit known, patched vulnerabilities. In Plesk, go to Tools & Settings » Updates and enable automatic updates for Plesk, and use unattended security updates for the operating system:
# AlmaLinux / RHEL
dnf install dnf-automatic -y
systemctl enable --now dnf-automatic-install.timer

# Ubuntu / Debian
apt install unattended-upgrades -y
dpkg-reconfigure -plow unattended-upgrades
Also upgrade end-of-life PHP versions. In Tools & Settings » PHP Settings disable any PHP branch that no longer receives security fixes.
2. Enable Two-Factor Authentication
Plesk supports TOTP authenticator apps through the free Security Core extension.
- Open Extensions and install Plesk Security Core (or the “Google Authenticator” extension on older versions).
- Go to Tools & Settings » Security » Two-Factor Authentication.
- Enable it, and require it for administrators at minimum.
- Each admin scans the QR code with an authenticator app and stores the recovery codes offline.
2FA alone neutralises the vast majority of password-spraying and credential-stuffing attacks.
3. Turn On and Tune Fail2Ban
Fail2Ban bans IP addresses that repeatedly fail logins. In Plesk it is under Tools & Settings » IP Address Banning (Fail2Ban). Enable it, then review the jails:
| Jail | Protects |
|---|---|
plesk-panel | Panel logins on 8443 |
plesk-modsecurity | Repeated ModSecurity violations |
plesk-wordpress | WordPress login attacks (requires WordPress Toolkit) |
ssh | SSH brute force |
plesk-postfix, plesk-dovecot | SMTP, IMAP and POP3 password guessing |
recidive | Repeat offenders, banned for longer |
Sensible starting values: ban time 3600 seconds or more, five failures, a 600-second find time. Always add your own static IP or VPN range to the Trusted IP addresses list so you never ban yourself. For the underlying concepts, see Fail2Ban explained. Check bans from the shell with:
plesk bin ip_ban --list
plesk bin ip_ban --banned
fail2ban-client status plesk-panel
4. Restrict Access to the Panel
If you manage Plesk from a fixed office or VPN, do not expose the panel to the whole internet.
Restrict by IP address: go to Tools & Settings » Restrict Administrative Access, choose “Deny access from all IPs except those in the allowed list” and add your addresses. Add your allowed IP *before* enabling it. Otherwise you will lock yourself out.
If you do lock yourself out, log in over SSH and clear the restriction from the Plesk database:
plesk db "DELETE FROM cp_access"
plesk db "UPDATE misc SET val='allow' WHERE param='access_policy'"
On a firewall level, the stronger approach is to allow port 8443 only from trusted addresses, as shown in the next section.
5. Configure the Plesk Firewall
The Plesk Firewall extension provides a manageable front-end to iptables or nftables. Install it from Extensions, then:
- Allow only the ports you use: 80, 443, 22 (SSH), 25/465/587 (SMTP), 993/995 (IMAP/POP3 over TLS), 8443 (panel)
- Restrict 8443 and 22 to known IP ranges where possible
- Close 21 (plain FTP) and use SFTP instead
- Use the preview and confirm feature so that a faulty rule rolls back automatically
Use the rollback safety: Plesk applies new rules and reverts them automatically after a short timeout unless you confirm. This is invaluable when you are editing remotely. If you prefer another firewall, see our guide to installing CSF on cPanel and Linux servers; its concepts apply to any server.
6. Harden SSH
Plesk gives shell access to subscriptions, so SSH matters. Use key-based authentication and disable passwords and direct root login:
# /etc/ssh/sshd_config
PermitRootLogin prohibit-password
PasswordAuthentication no
MaxAuthTries 3
Reload with systemctl reload sshd. The full procedure is in How to Set Up SSH Key Authentication and Disable Password Login. Do not forget to confirm that key login works from a second session before disabling passwords.
7. Enable ModSecurity (WAF)
ModSecurity inspects HTTP requests and blocks attacks such as SQL injection and cross-site scripting.
- Go to Tools & Settings » Web Application Firewall (ModSecurity).
- Turn it on and choose a rule set: the free Comodo WAF or OWASP Core Rule Set, or the paid Atomicorp rules.
- Start in Detection Only for a few days, review the audit log and add exclusions for false positives.
- Switch to On once you are happy with the results.
You can disable a rule for a single domain instead of turning off the whole WAF. A deeper explanation of tuning is in our ModSecurity tuning guide, which applies to Plesk as well.
8. Secure Websites with SSL and Secure Headers
- Install Let’s Encrypt certificates and tick “Secure the webmail” and the wildcard option where needed.
- Enable Permanent SEO-safe 301 redirect from HTTP to HTTPS for every domain.
- Enable HSTS in the domain’s Hosting & DNS » Apache & nginx Settings once HTTPS is stable.
- Secure the panel itself with a trusted certificate: Tools & Settings » SSL/TLS Certificates.
9. Isolate Customers from Each Other
If you host multiple customers, enable PHP-FPM served by Apache or nginx with a separate pool per subscription, which runs each site as its own system user. Turn on Resource Controller limits and CloudLinux CageFS if you use CloudLinux. Avoid sharing one system user across several sites.
10. Backups and Monitoring
Security includes recoverability. Configure scheduled backups to remote storage from Tools & Settings » Backup Manager, and test a restore. Enable Monitoring and notifications for disk, memory and service failures. See also How to Back Up a Linux Server.
Plesk Security Hardening Quick Checklist
- Automatic updates on, old PHP disabled
- 2FA mandatory for admins
- Fail2Ban on with sensible jails and trusted IPs
- Panel and SSH limited by IP or firewall
- SSH keys only, root login restricted
- ModSecurity enabled and tuned
- HTTPS and HSTS everywhere
- Per-subscription PHP-FPM isolation
- Off-server backups tested
Frequently Asked Questions
Should I change the default Plesk port 8443?
Changing it only reduces noise from automated scans. Real protection comes from IP restriction, 2FA and Fail2Ban, so treat a port change as optional.
Is Fail2Ban enough on its own?
No. It stops repeated guessing but not a single stolen password or an unpatched exploit. Layer it with 2FA, updates and a WAF.
How do I unban my own IP in Plesk?
Run plesk bin ip_ban --unban YOUR.IP.ADDRESS, or remove it in IP Address Banning » Banned IP Addresses.
Does Plesk include a malware scanner?
Plesk offers the paid Imunify and ImunifyAV extensions, and the free Plesk WordPress Toolkit has a security scan for WordPress sites. See Plesk WordPress Toolkit guide.