

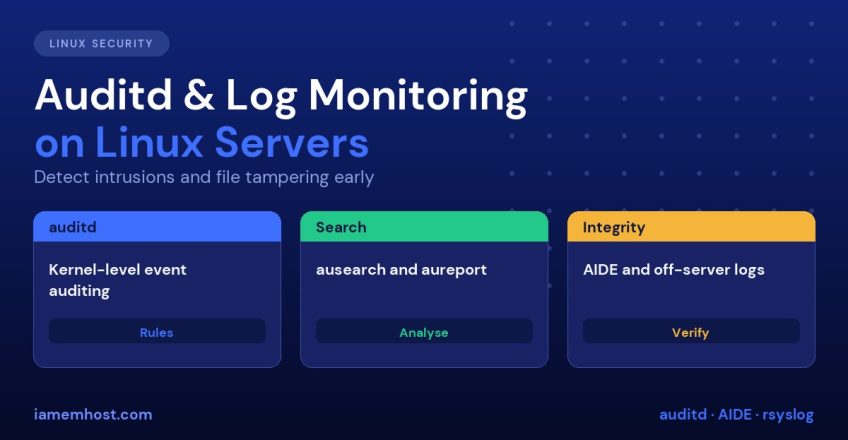

When a server is compromised, the story is almost always written in its logs: a login from a strange IP, a new user, a modified sshd_config, a cron entry nobody created. The problem is that nobody was watching, or the attacker deleted the evidence. Running auditd on Linux (the Linux Audit framework) records security-relevant events at the kernel level and, combined with off-server logging and file-integrity checks, gives hosting administrators a reliable way to see what really happened. This guide covers installing auditd, writing practical rules, searching events and building a monitoring routine.
What Is Auditd on Linux?
auditd is the user-space daemon for the Linux Audit subsystem. Unlike ordinary application logs, audit records come from the kernel, so they capture activity even when the application never logs it: who opened a file, which command was executed, which user changed another user’s password. It is a requirement for many compliance frameworks (PCI DSS, HIPAA, CIS), and it is available on RHEL, AlmaLinux, Rocky, Ubuntu and Debian.
Step 1: Install and Enable Auditd
# AlmaLinux / RHEL / Rocky
dnf install audit -y

# Debian / Ubuntu
apt install auditd audispd-plugins -y

systemctl enable --now auditd
auditctl -s      # shows status and lost-event counters
On RHEL-family systems, use service auditd restart rather than systemctl restart auditd if the unit refuses a restart; this is a known design restriction of the audit daemon.
Configure retention in /etc/audit/auditd.conf. A busy hosting server needs more than the defaults:
max_log_file = 100
num_logs = 10
max_log_file_action = ROTATE
space_left_action = EMAIL
action_mail_acct = root
Step 2: Write Rules That Matter
Rules live in /etc/audit/rules.d/*.rules and are loaded with augenrules --load. The two main types are file watches (-w) and system call rules (-a).
Create /etc/audit/rules.d/hosting.rules:
# Identity and authentication
-w /etc/passwd -p wa -k identity
-w /etc/shadow -p wa -k identity
-w /etc/group  -p wa -k identity
-w /etc/sudoers -p wa -k sudoers
-w /etc/sudoers.d/ -p wa -k sudoers

# SSH configuration and keys
-w /etc/ssh/sshd_config -p wa -k sshd_config
-w /root/.ssh/ -p wa -k root_ssh

# Scheduled tasks (a favourite persistence trick)
-w /etc/crontab -p wa -k cron
-w /etc/cron.d/ -p wa -k cron
-w /var/spool/cron/ -p wa -k cron

# Web server and control panel configuration
-w /etc/httpd/conf/ -p wa -k webconfig
-w /etc/nginx/ -p wa -k webconfig

# Kernel modules and time changes
-a always,exit -F arch=b64 -S init_module,delete_module -k modules
-a always,exit -F arch=b64 -S adjtimex,settimeofday -k time_change

# Commands run by root through sudo, and failed access
-a always,exit -F arch=b64 -S execve -F euid=0 -F auid>=1000 -F auid!=4294967295 -k root_commands
-a always,exit -F arch=b64 -S open,openat -F exit=-EACCES -k access_denied
In -p wa, w means write and a means attribute change. Add r for reads, and x for execute. The -k key is a label you will search by later.
Load and verify:
augenrules --load
auditctl -l
Keep your rule set focused. Auditing every execve or every file read on a busy web server creates an enormous log volume and slows the system. Start with configuration, identity and persistence locations, then expand.
Step 3: Search and Report
ausearch finds events and aureport summarises them:
# Anyone who changed /etc/passwd today, with human-readable output
ausearch -k identity -ts today -i

# Failed logins and authentication events
ausearch -m USER_LOGIN,USER_AUTH --success no -ts yesterday -i

# Everything a particular user did
ausearch -ua 1001 -ts today -i

# Summaries
aureport --auth --summary
aureport --failed --summary
aureport -x --summary       # executables run
A single ausearch -i event shows the full chain: the user (auid is the original login user even after su or sudo), the process, the working directory and the file touched. This original login ID is what makes audit data so useful for attribution.
Step 4: Combine It with Normal Log Monitoring
Auditd works alongside, not instead of, ordinary logs. These are the files and commands to check regularly:
| What | Where | Command | |||||
|---|---|---|---|---|---|---|---|
| SSH logins | /var/log/secure or /var/log/auth.log | last, lastb, grep "Accepted" /var/log/secure | |||||
| Failed SSH | same | `grep “Failed password” /var/log/secure \ | awk ‘{print $(NF-3)}’ \ | sort \ | uniq -c \ | sort -rn \ | head` |
| sudo usage | same | grep sudo /var/log/secure | |||||
| Kernel and hardware | /var/log/messages, journalctl -k | journalctl -p err -b | |||||
| Web access | /var/log/httpd/, /var/log/nginx/ | `awk ‘{print $1}’ access.log \ | sort \ | uniq -c \ | sort -rn \ | head` | |
| Cron | /var/log/cron | grep CRON /var/log/cron | |||||
/var/log/maillog | grep "auth failed" /var/log/maillog |
Block repeat offenders automatically with Fail2Ban rather than reading the lists by hand, and move SSH to keys only as shown in SSH Key Authentication Setup. Also make sure old logs do not fill the disk: see Disk Space Management on Linux.
Step 5: Ship Logs Off the Server
An attacker with root will clear local logs. The remedy is to copy them somewhere else in real time. With rsyslog, forward to a central syslog host or a log service:
# /etc/rsyslog.d/90-forward.conf
*.* @@logs.example.com:514
To forward audit records too, enable the audit dispatcher plugin (audisp-remote, or plugins.d/syslog.conf with active = yes). Choose from Graylog, the Elastic stack, Wazuh or a hosted logging service. Even a second small server running rsyslog is much better than none. Use TLS in production, and restrict the receiver by firewall.
Step 6: Detect File Tampering with AIDE
Auditd tells you who changed a file as it happens. AIDE (Advanced Intrusion Detection Environment) takes a cryptographic baseline of important files and tells you later what has changed, which catches changes made while auditd was stopped.
dnf install aide -y        # or: apt install aide -y
aide --init                # builds the baseline database
mv /var/lib/aide/aide.db.new.gz /var/lib/aide/aide.db.gz
aide --check               # compare current state to the baseline
Schedule the check with cron and email the report (Cron Jobs Explained). After legitimate updates, run aide --update and accept the new baseline. Store a copy of the baseline database off the server, or an attacker can regenerate it.
For web content, an additional lightweight option is Linux Malware Detect and ClamAV scans, as described in our guide to recovering a hacked cPanel account.
Step 7: Make the Audit Rules Immutable
Once you are satisfied with the rule set, add this as the last line of the rules file:
-e 2This locks the configuration so that even root cannot change audit rules until the next reboot, so an intruder cannot quietly disable auditing. Remember that changing rules afterwards requires a reboot, so test thoroughly first.
Signs of Intrusion to Look For
- Logins from unfamiliar countries or at unusual hours (
last -i) - New users or UID 0 accounts (
awk -F: '$3==0' /etc/passwd) - Modified
authorized_keys,sshd_configorsudoers - New cron entries or
systemdtimers - Unknown listening ports (
ss -tulpn) - Processes running from
/tmp,/dev/shmor deleted binaries - Sudden spikes in outbound traffic or mail
Frequently Asked Questions
Does auditd slow down the server?
Targeted rules have little impact. Auditing every system call on a busy server can add noticeable overhead and huge logs, so keep rules focused on security-relevant files and events.
What is the difference between auditd and syslog?
Syslog collects messages that applications choose to write. Auditd records events from the kernel regardless of what the application logs, making it much harder to evade.
Where are audit logs stored?
In /var/log/audit/audit.log, rotated according to /etc/audit/auditd.conf.
Do I still need Fail2Ban or a firewall?
Yes. Auditd detects and records; it does not block. Use it together with a firewall, Fail2Ban and patching.