
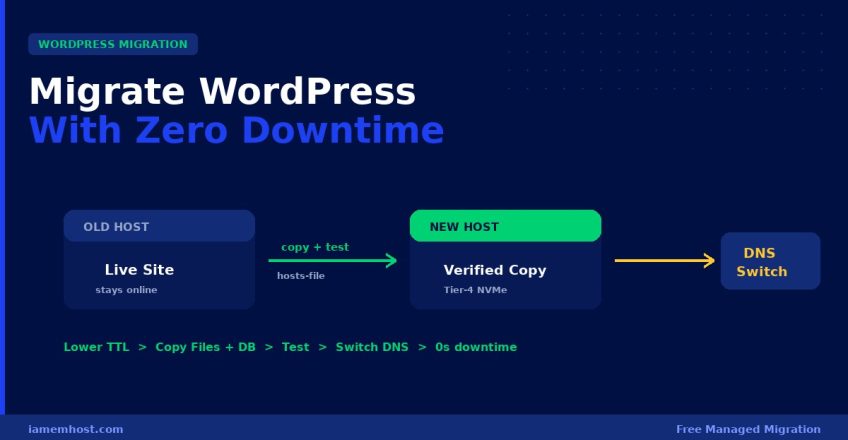

Migrating a WordPress site to a new host sounds risky, but with the right sequence you can move everything — files, database, and emails — without a single second of downtime for your visitors. The secret is to copy everything first, test it on the new server, and only switch DNS once the new site is confirmed working. This guide covers both the manual method and the plugin method, plus the DNS TTL strategy that makes zero-downtime possible.
Why Most Migrations Cause Downtime (and How to Avoid It)
Downtime happens when people change DNS before the new server is ready, or when they take the old site offline during the transfer. The zero-downtime approach reverses this: the old site stays live and serving traffic the entire time, while you build an exact copy on the new host in parallel. Only when the copy is verified do you flip DNS — and because both servers serve identical content during the DNS propagation window, visitors never notice the switch.
Step 1 — Lower Your DNS TTL (Do This 24–48 Hours Before)
TTL (Time To Live) tells DNS resolvers how long to cache your domain’s records. The day before migrating, lower the TTL on your A record from the default (often 3600–14400 seconds) to 300 seconds (5 minutes). This means when you eventually switch IPs, the change propagates worldwide in minutes instead of hours.
# Check your current TTL
dig yourdomain.com A +noall +answer

# Example output — the number after the domain is the TTL
# yourdomain.com.  3600  IN  A  203.0.113.10
# Lower this 3600 to 300 in your DNS panel, then wait for the old TTL to expire
Method 1: Manual Migration (Full Control)
Step 2 — Back Up Files and Database on the Old Host
# Compress the entire WordPress directory (run via SSH on the old host)
cd /home/olduser/public_html
tar -czf site-files.tar.gz .

# Export the database (find DB name/user in wp-config.php)
mysqldump -u dbuser -p dbname > database.sql
Step 3 — Transfer to the New Host
# Copy both files directly server-to-server with rsync/scp
scp site-files.tar.gz database.sql newuser@new-server-ip:/home/newuser/public_html/

# On the NEW server, extract files
cd /home/newuser/public_html
tar -xzf site-files.tar.gz
Step 4 — Create the Database and Import on the New Host
# Create a new database and user in cPanel (MySQL Databases), then import
mysql -u newdbuser -p newdbname < database.sql

# Update wp-config.php with the NEW database name, user, and password
nano wp-config.php
# define('DB_NAME', 'newdbname');
# define('DB_USER', 'newdbuser');
# define('DB_PASSWORD', 'newpassword');
Step 5 — Test Before Switching DNS (Critical)
This is the step that guarantees zero downtime. Edit your local computer’s hosts file to point your domain to the new server IP — only your machine sees the new site, while the rest of the world still hits the old one.
# On Windows: C:WindowsSystem32driversetchosts
# On macOS/Linux: /etc/hosts
# Add this line (replace with your new server's IP):
203.0.113.50   yourdomain.com www.yourdomain.com
Now visit yourdomain.com in your browser. You’re seeing the site on the new server. Click through pages, test forms, check images, and log into wp-admin. Once everything works, remove the hosts file line.
Step 6 — Switch DNS
Update your domain’s A record to the new server IP. Because you lowered the TTL to 300 seconds in Step 1, propagation completes in about 5 minutes. During this window, both servers serve identical content, so no visitor experiences an error. Keep the old hosting active for 48 hours as a safety net.
Method 2: Plugin Migration (Easiest)
If you’re not comfortable with SSH, a migration plugin automates the whole process:
- All-in-One WP Migration — Export your site to a single file, import it on the new host. Best for sites under 512 MB (free tier).
- Duplicator — Creates a package + installer; excellent for larger sites and developers.
- Migrate Guru — Free, handles large sites, and migrates directly server-to-server without using your bandwidth.
Even with a plugin, still use the hosts file test (Step 5) before switching DNS — it’s the single most important step for zero downtime.
Post-Migration Checklist
- ✅ Reinstall the SSL certificate on the new host (AutoSSL/Let’s Encrypt usually handles this automatically)
- ✅ Verify permalinks work — go to Settings → Permalinks and click Save to flush rewrite rules
- ✅ Test all contact forms and email delivery from the new server
- ✅ Run a search-replace if the URL changed:
wp search-replace 'http://old' 'https://new' --all-tables - ✅ Confirm cron jobs and scheduled posts still fire
- ✅ Submit the site to Google Search Console and check for crawl errors
- ✅ Keep the old host active for 48 hours before cancelling
Let Us Migrate It for You — Free
Migrations are stressful, and one wrong step can break a live site. Every WordPress Hosting and Linux Shared Hosting plan at IAMEM HOSTING includes free, expert-managed migration with zero downtime. Our team handles the entire transfer — files, database, emails, and SSL — and only switches DNS once your site is verified working on our Tier-4 infrastructure. Contact us and we’ll take it from here.