

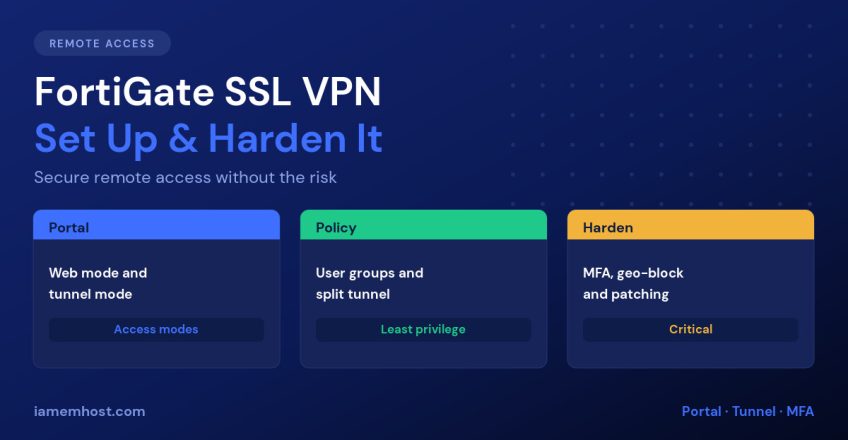

FortiGate SSL VPN gives remote staff access to internal systems through the firewall using nothing more than a browser or the FortiClient app. It is quick to configure — which is precisely the problem. SSL VPN portals have been among the most heavily targeted enterprise services of the last several years, and the compromises almost always trace back to the same handful of omissions: unpatched firmware, no multi-factor authentication, and a portal exposed to the entire internet. This guide covers the configuration and the hardening that has to go with it.
Web Mode vs Tunnel Mode
| Web mode | Tunnel mode | |
|---|---|---|
| Client software | None — a browser | FortiClient |
| What it reaches | Only bookmarked web/RDP/SSH apps | Any IP service, like being on the LAN |
| Addressing | None assigned | Client gets an IP from a pool |
| Best for | Occasional access from unmanaged devices | Day-to-day remote work |
| Risk profile | Larger attack surface on the appliance | Smaller, but needs endpoint control |
Enable only what you need. If everyone uses FortiClient, disable web mode entirely — it removes a substantial amount of exposed code from the internet.
One planning note: on recent FortiOS releases Fortinet has been steering customers toward IPsec dial-up VPN and ZTNA instead of SSL VPN, and tunnel mode has been removed from some entry-level models with limited memory. Check your model and firmware before designing around it.
Step 1: Create Users and a Group
Always assign VPN access to a group, never to individual users in the policy — it keeps onboarding and offboarding to a single membership change.
config user local
    edit "jsmith"
        set type password
        set passwd "UseAStrongPasswordHere"
    next
end

config user group
    edit "VPN-Users"
        set member "jsmith"
    next
end
In production, point the group at LDAP/Active Directory or a RADIUS server instead of local accounts, so disabling someone in AD immediately revokes their VPN access.
Step 2: Configure the Portal
Under VPN » SSL-VPN Portals, edit full-access or create your own. Enable tunnel mode, disable web mode unless you need it, and turn on split tunnelling:
config vpn ssl web portal
    edit "tunnel-only"
        set tunnel-mode enable
        set web-mode disable
        set ip-pools "SSLVPN_TUNNEL_ADDR1"
        set split-tunneling enable
        set split-tunneling-routing-address "Internal_Subnets"
        set keep-alive enable
    next
end
Split tunnelling sends only corporate-bound traffic through the VPN; everything else goes out the user’s own connection. That keeps your internet circuit free and video calls usable. If policy requires all traffic to be inspected, disable it and size your bandwidth accordingly.
Step 3: SSL VPN Settings
config vpn ssl settings
    set servercert "vpn-cert"
    set tunnel-ip-pools "SSLVPN_TUNNEL_ADDR1"
    set source-interface "wan1"
    set source-address "all"
    set default-portal "tunnel-only"
    set port 10443
    set ssl-min-proto-ver tls1-2
    set dns-server1 192.168.10.5
    config authentication-rule
        edit 1
            set groups "VPN-Users"
            set portal "tunnel-only"
        next
    end
end
Three of those lines are security decisions, not cosmetics:
set port 10443— moving off 443 doesn’t stop a targeted attacker, but it removes you from the mass scanning that finds most victims. It also frees 443 for your web services.set ssl-min-proto-ver tls1-2— refuse legacy TLS outright.set servercert— use a real publicly-trusted certificate. The default self-signed cert trains users to click through warnings, which is exactly the habit phishing relies on.
Step 4: The Firewall Policy
VPN clients arrive on the virtual ssl.root interface. Write a policy from there to your internal network — and scope it, rather than allowing everything:
config firewall policy
    edit 0
        set name "SSLVPN-to-Internal"
        set srcintf "ssl.root"
        set dstintf "INTERNAL"
        set srcaddr "SSLVPN_TUNNEL_ADDR1"
        set dstaddr "Internal_Subnets"
        set groups "VPN-Users"
        set action accept
        set schedule "always"
        set service "RDP" "SMB" "HTTPS" "DNS"
        set utm-status enable
        set ips-sensor "default"
        set av-profile "default"
        set logtraffic all
    next
end
A VPN policy with set dstaddr "all" and set service "ALL" means one stolen password gives an attacker unrestricted lateral movement across your whole network. Grant the services people actually use.
Step 5: Harden It
Configuration is half the work. These are the controls that decide whether your VPN becomes an incident:
- Patch firmware, promptly and always. Every major SSL VPN compromise of recent years exploited a known, patched vulnerability. Subscribe to Fortinet PSIRT advisories and treat VPN firmware updates as urgent, not quarterly.
- Enforce multi-factor authentication for every VPN user — FortiToken, or MFA via RADIUS. This is the single highest-value control on the list, because it defeats credential stuffing outright.
- Restrict access geographically. If your staff are all in one or two countries, block the rest with a local-in policy.
- Disable web mode if you don’t use it, and remove unused portals and bookmarks.
- Rename or disable the default admin account and restrict administrative access to internal interfaces or a trusted address group.
- Audit user accounts monthly. Dormant VPN accounts from departed staff are a standard attack path.
- Send logs to FortiAnalyzer or a SIEM and alert on failed-login bursts and logins from new countries.
- Set idle and session timeouts so forgotten sessions don’t stay open indefinitely.
Geo-restriction using a local-in policy, which filters traffic destined for the FortiGate itself:
config firewall address
    edit "Geo-Allowed"
        set type geography
        set country "IN"
    next
end

config firewall local-in-policy
    edit 1
        set intf "wan1"
        set srcaddr "Geo-Allowed"
        set dstaddr "all"
        set action accept
        set service "SSLVPN-10443"
        set schedule "always"
    next
    edit 2
        set intf "wan1"
        set srcaddr "all"
        set dstaddr "all"
        set action deny
        set service "SSLVPN-10443"
        set schedule "always"
    next
end
Order matters here exactly as it does in normal policies — the allow must precede the deny. Test from an allowed address before you disconnect.
Step 6: Verify and Monitor
# Who is connected right now
get vpn ssl monitor

# Live tunnel debugging
diagnose debug application sslvpn -1
diagnose debug enable

# Confirm the listener and certificate
get vpn ssl settings
diagnose vpn ssl statistics
In the GUI, Dashboard » Network » SSL-VPN shows active sessions, and Log & Report » VPN Events records every authentication attempt. Review the failed-login log regularly — a sustained rise is usually the first sign that someone has found your portal.
Conclusion
Setting up FortiGate SSL VPN is a portal, a settings block, and one firewall policy. Making it safe takes more: a publicly-trusted certificate, a non-standard port, TLS 1.2 minimum, mandatory MFA, split tunnelling, a scoped policy that grants only the services people need, geographic restriction through a local-in policy, and firmware patched the week updates ship. The configuration is quick; treat the hardening list as the non-negotiable part.